
AR 15 Build
Kit Build
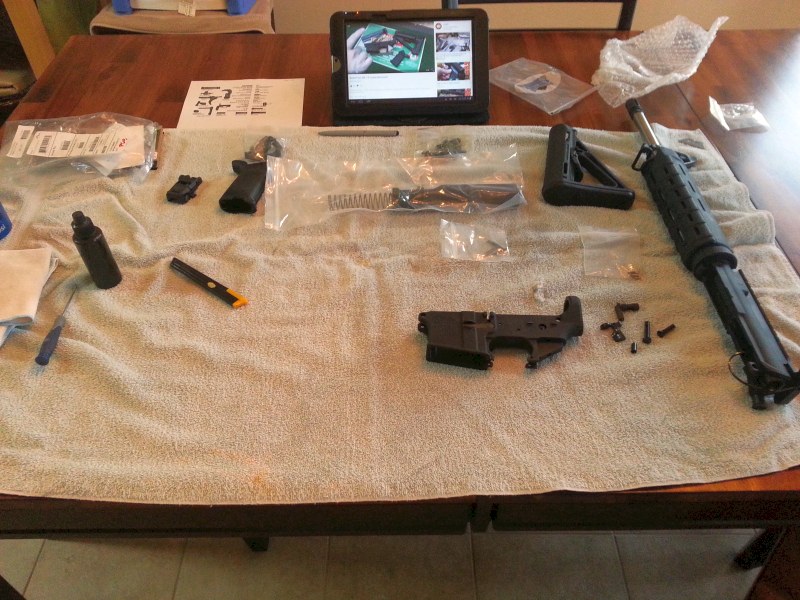
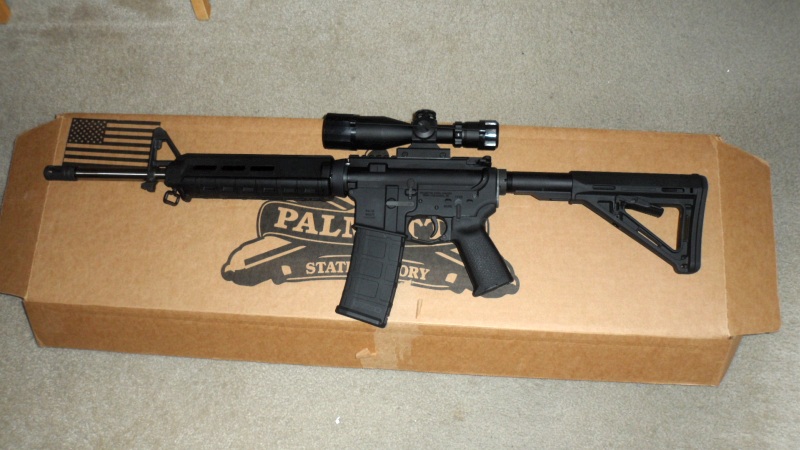
Time to document a complete kit build, a Palmetto State Armory Stainless Steel 1:8 Twist Carbine length AR15 with a Magpul Furniture set.
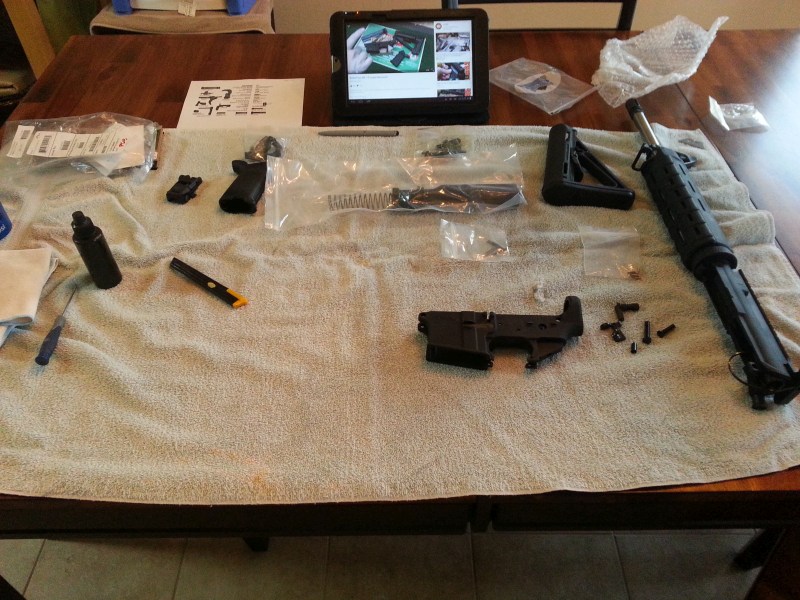
I laid everything from the kit, a few tools, along with a tablet (for YouTube video assembly) on the kitchen table so I could get a "Big Picture" photo. I had to transfer the build to the garage as "The Boss" said something about supper!
Tools
You can do the build with general hand tools. But, it can be difficult to do some operations. I bought a set of Gun gun-smithing tools & which makes the installation process much easier. Check out the Tools Section.
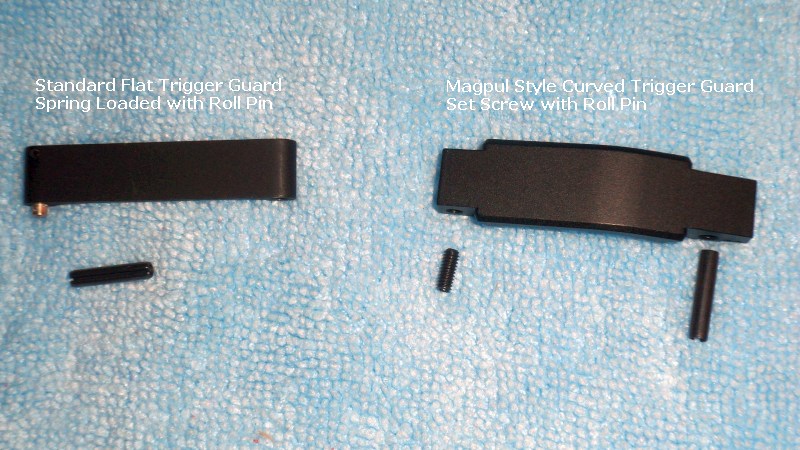
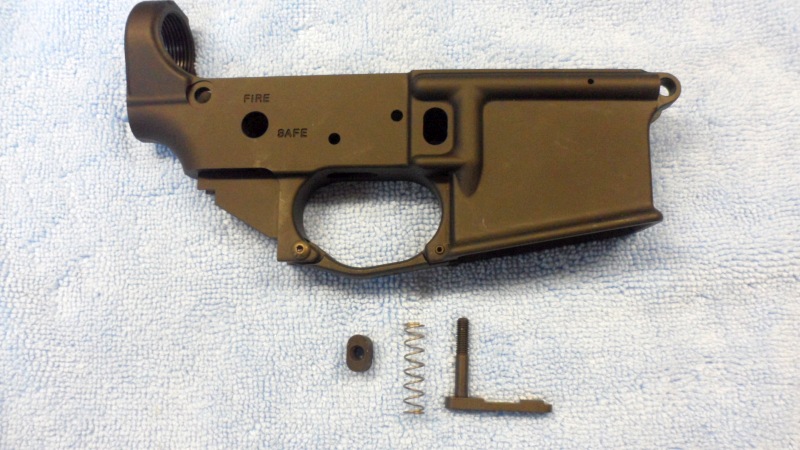
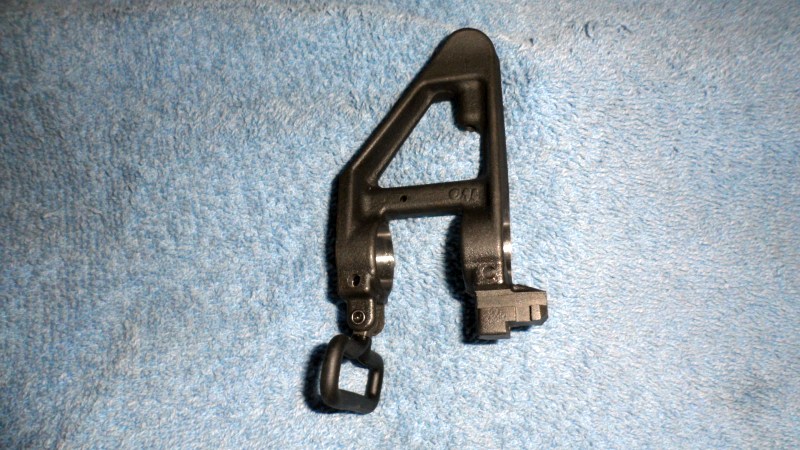
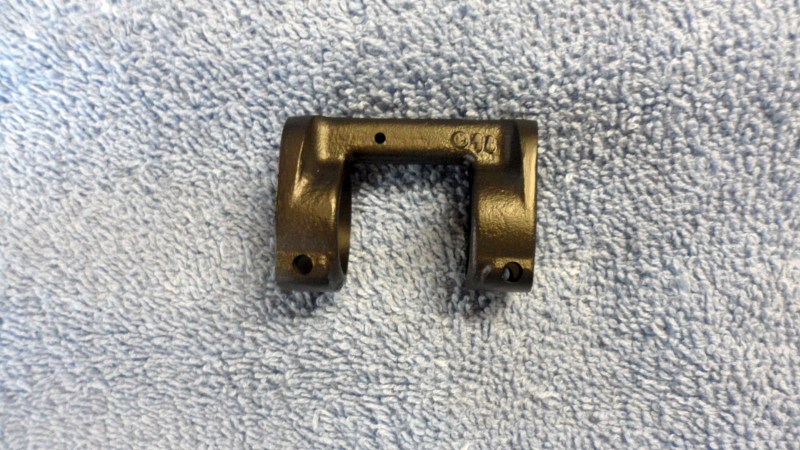
Install The Trigger Guard
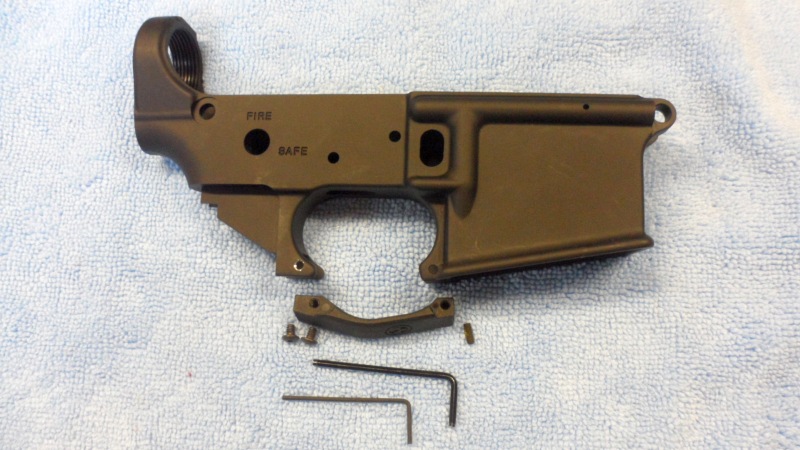
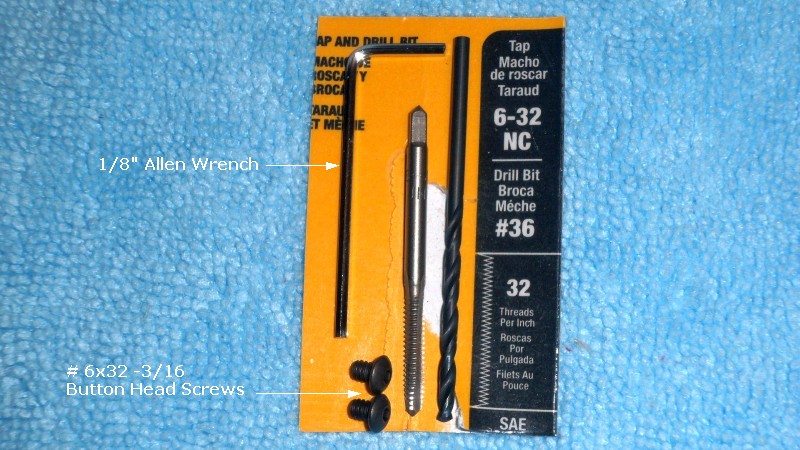
The standard supplied trigger guard is just a flat piece installed with a roll pin. The Mapul version is curved & uses a set screw & roll pin. I take it one step further by tapping the trigger pin holes with a # 6x32 tap & use 2 button head screws to secure the trigger guard. This makes for an easy install & remove.
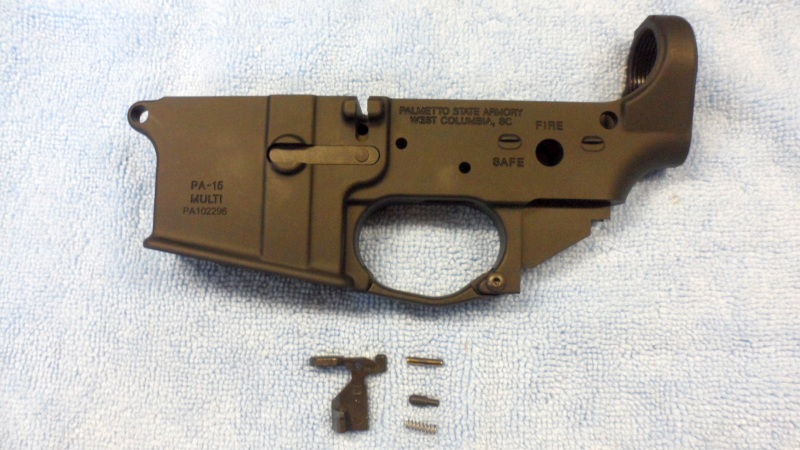
Install The Magazine Realease
Install The Bolt Catch
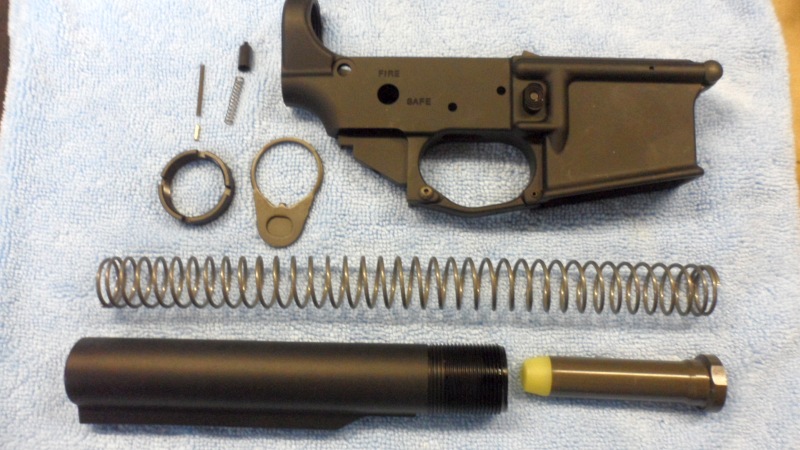
Install The Buffer Tube & Rear Take Down Pin
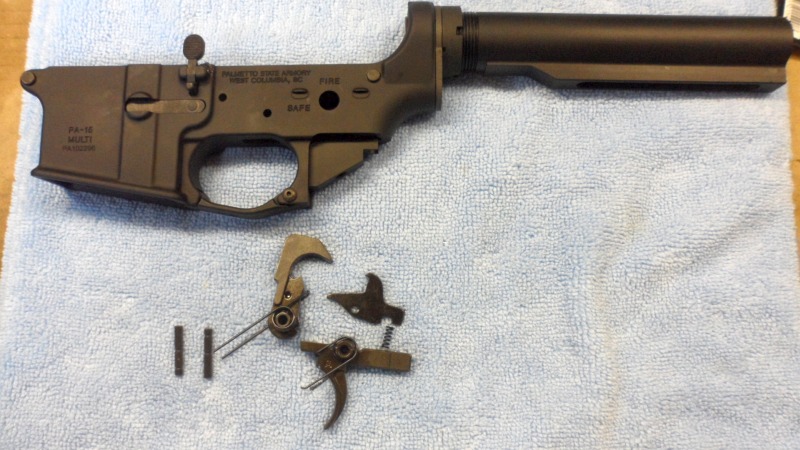
Install The Fire Control Group - AKA The "Trigger"
Install The Safe/Fire Selector & Pistol Grip
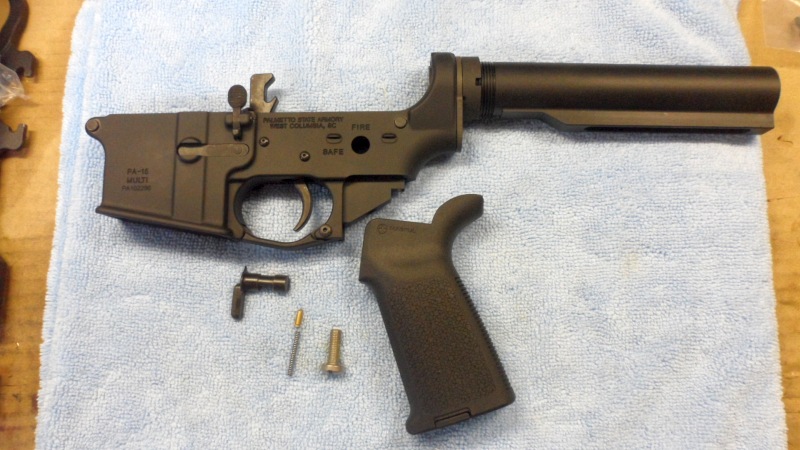
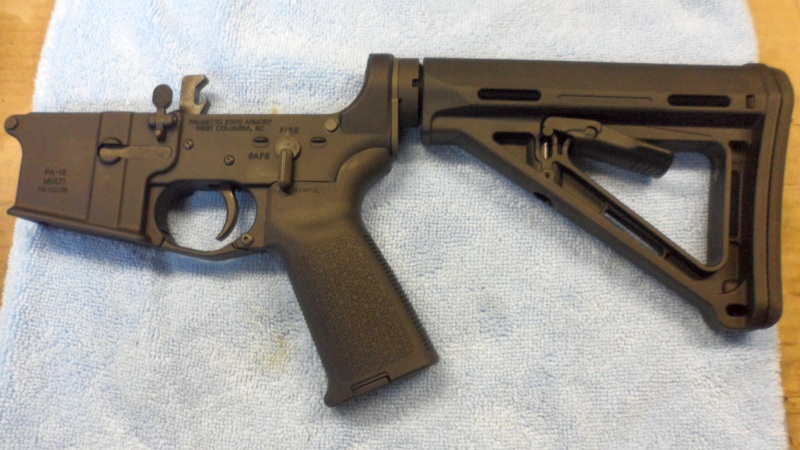
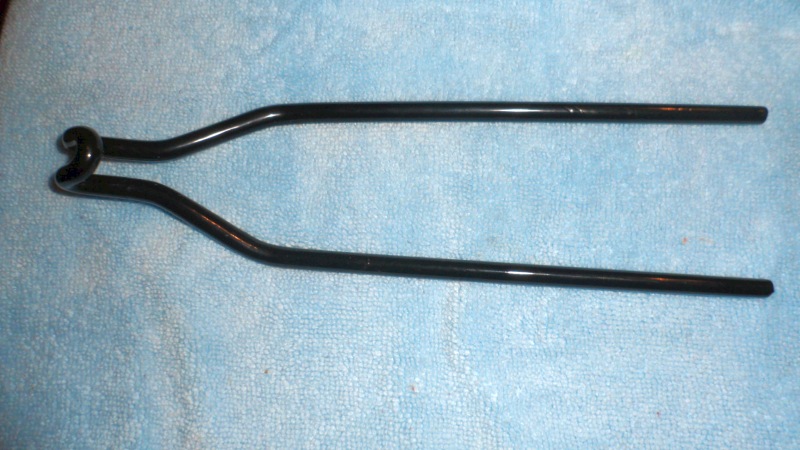
Install The 6 Position Butt Stock
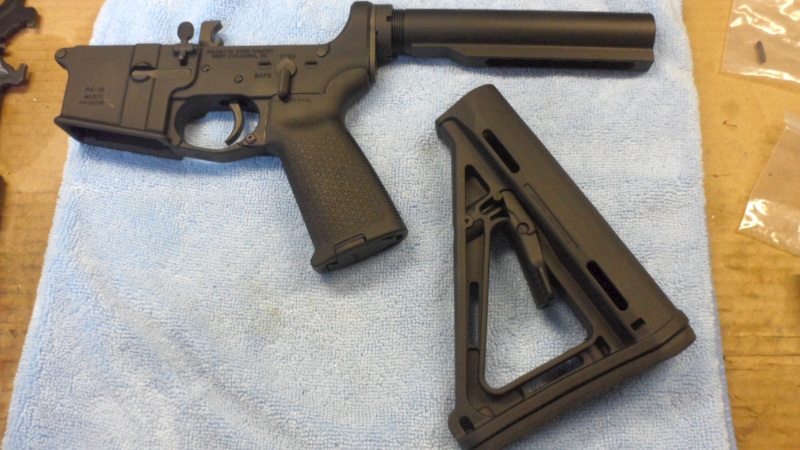
Lower Is Complete
Install The Upper - Add Some Sights & Magpul Magazine
Iron Flip Up
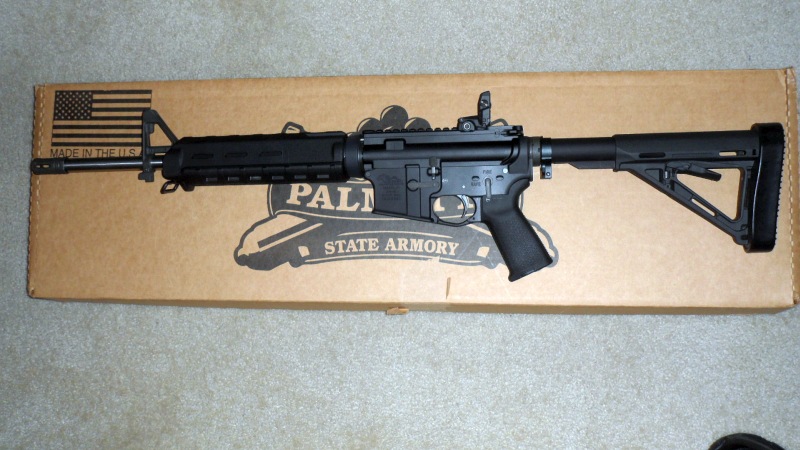
Optics
Return To AR15 Platform/Builds
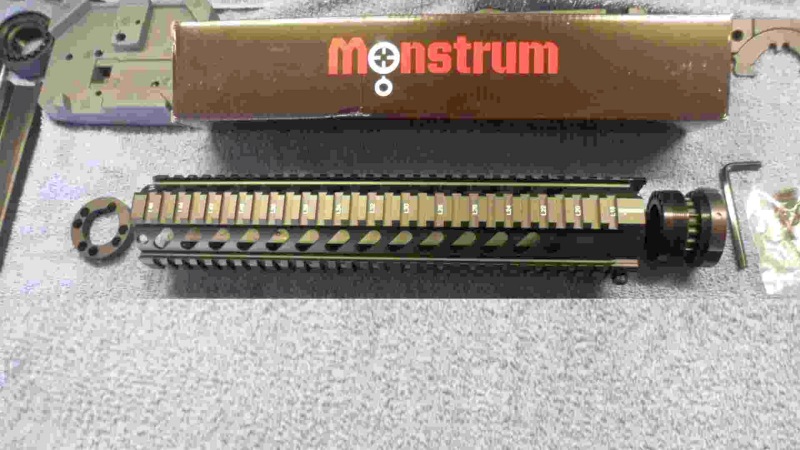
QuadRail Build - Part 1
Do you ever get tired of working on cars... I do, so I needed another hobby so to speak. Guns seem to catch my eye. But, most of my stuff has been handguns like the 44 mag, 1911 45 ACP and a couple of 9mm carry guns. About 6 months ago my SIL bought a budget AR15 kit and assembled it. The price was right and made for a nice everyday shooter/plinker.
So, I thought what the hell I would get one just to mod and hone my gunsmithing skills. My first mod was to put a Quad full float handguard system on it.
Of course, you will need a few gunsmithing tools like regular punches, roll pin punches, hammers, upper/lower vise blocks, AR15 wrench and other hand tools. Check out the Tools Section.
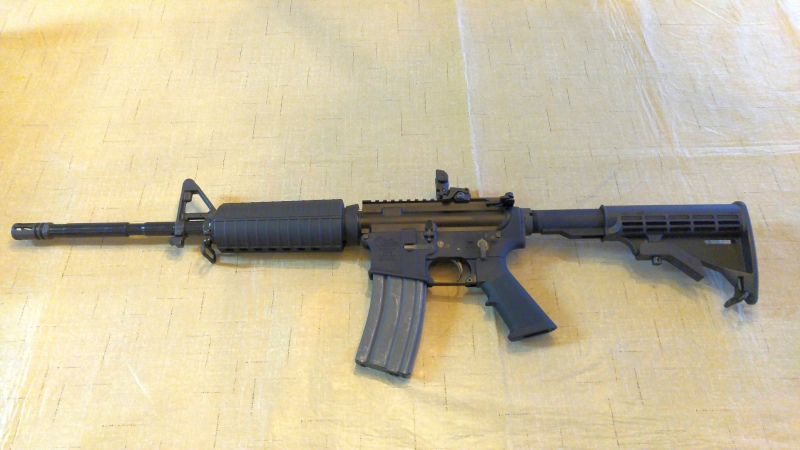
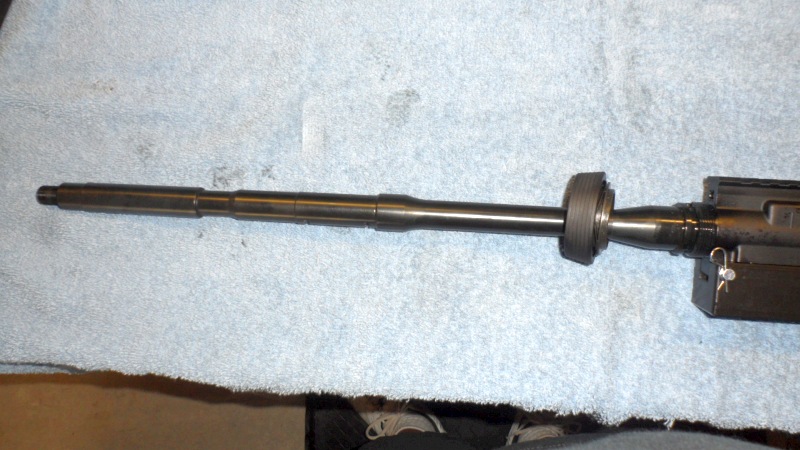
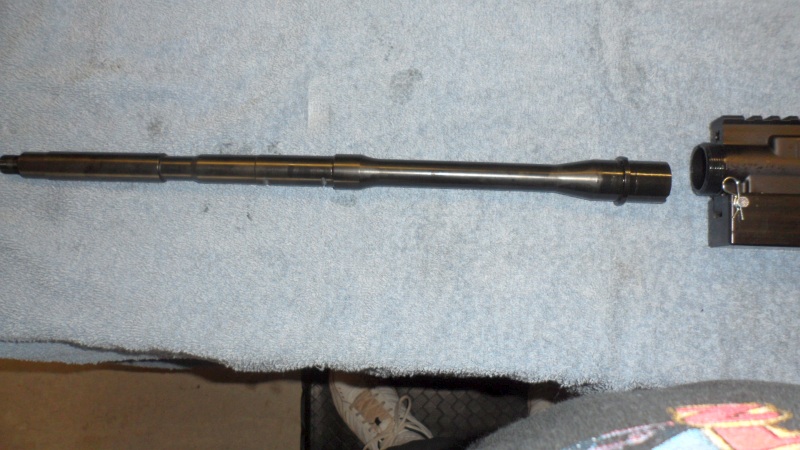
The idea is to change this AR15 Upper, bag of parts and AR15 lower....
Into to this....
Then into this...

First, you need to strip off the handguards. The "delta ring" can be a PITA when you remove the handguards. But, if you use the Delta Ring removal tool it is a piece of cake.

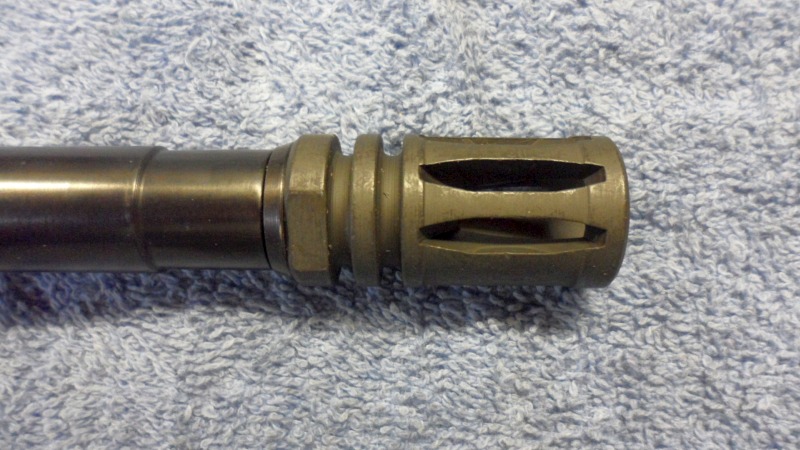
Next to come off is the Flash hider. You will need an upper vise block and the AR15 wrench.

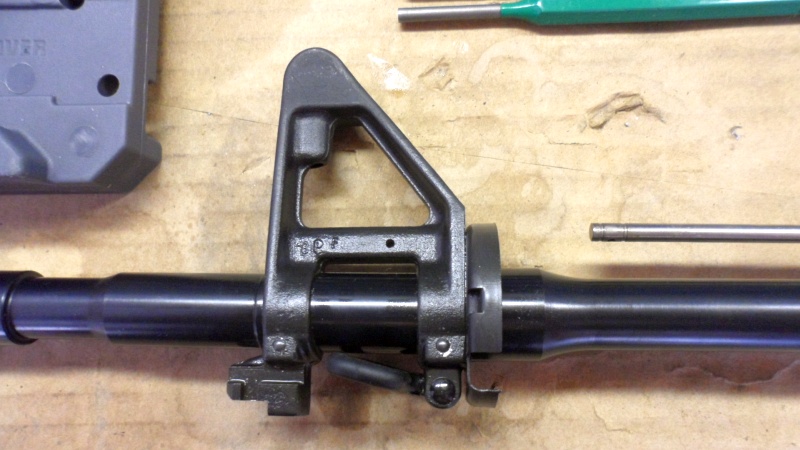
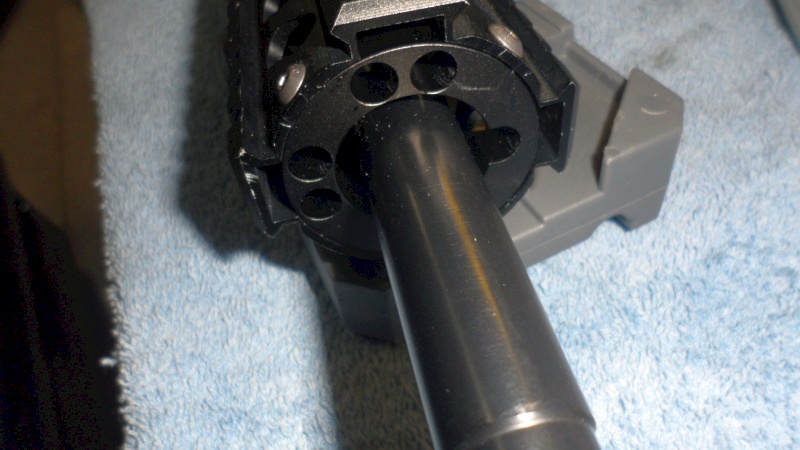
Now the hard part, the A2 Fronts/gas block. Here is where you need some "good" punches and medium-sized size ball peen hammers and gunsmith blocks. A chunk of 2x4 with a couple of holes drilled it will also work. The reason these pins are a PITA is they are TAPERED. So, they only come out one way and go in one way. You also have to remove the roll pin that holds the gas tube in and it is a little bitty one.
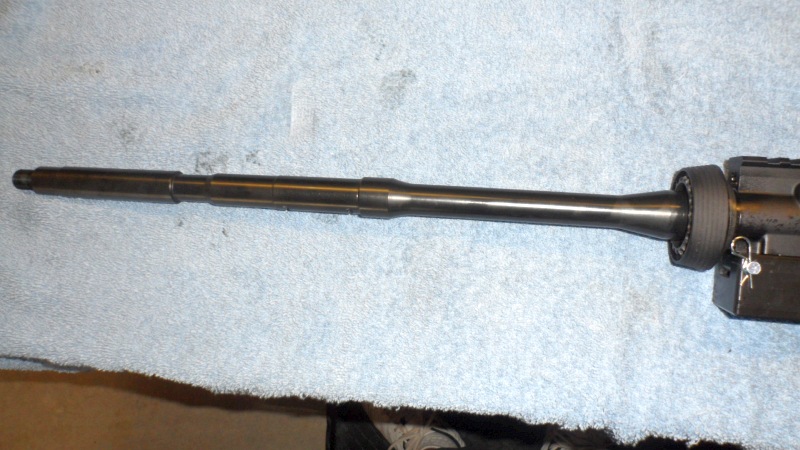
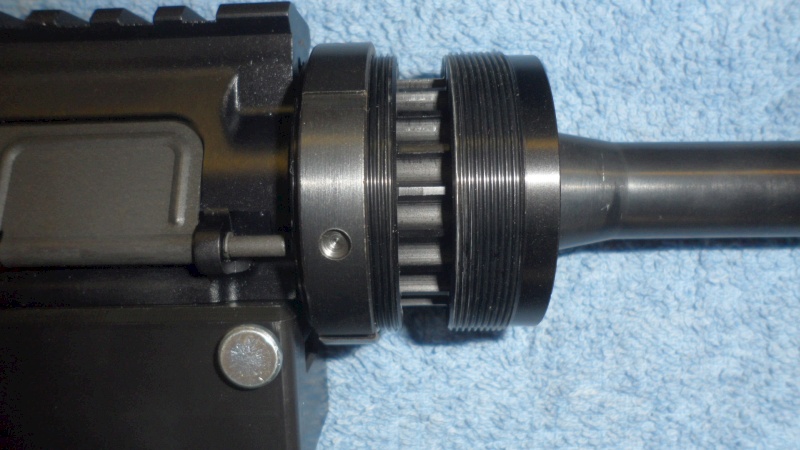
Next up is the Delta ring/barrel nut. You will need the upper vise block and the AR15 wrench. It takes a bit to remove as it is torqued fairly tight.
Return To AR15 Platform/Builds
QuadRail Build - Part 2
Now comes the fun part... Putting it all back together and test firing.
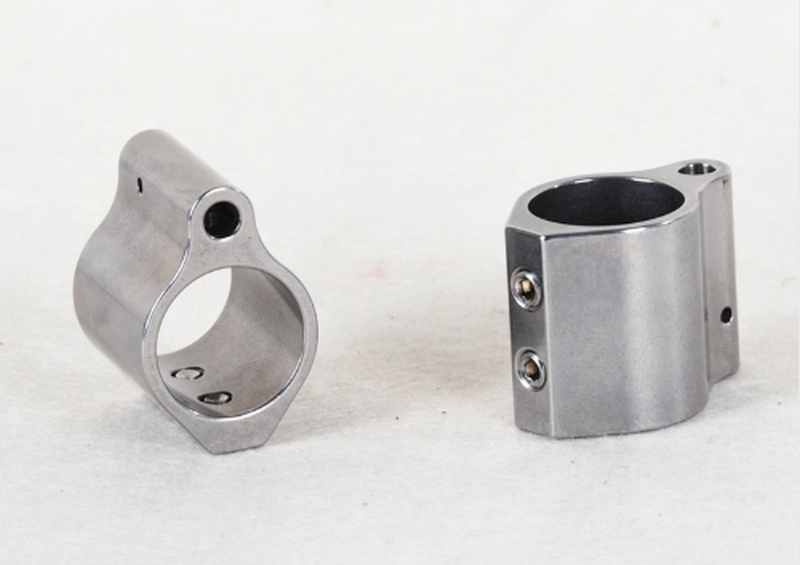
The first thing that has to happen is you need a low-profile gas block or you need to modify the A2 Sight-gas block.
Options:
- Modify the A2 sight-gas block in-house with a cutoff tool and some Dremel work.
- Have someone mod it for you.
I was lucky in that one of the Modern Mopar forum members who works at Modern Paladin Guns Works in Newport News, VA. mod'd my A2 Sight-Gas block.
- Buy one already done if you want the A2 Style
- Buy a low-profile gas block.
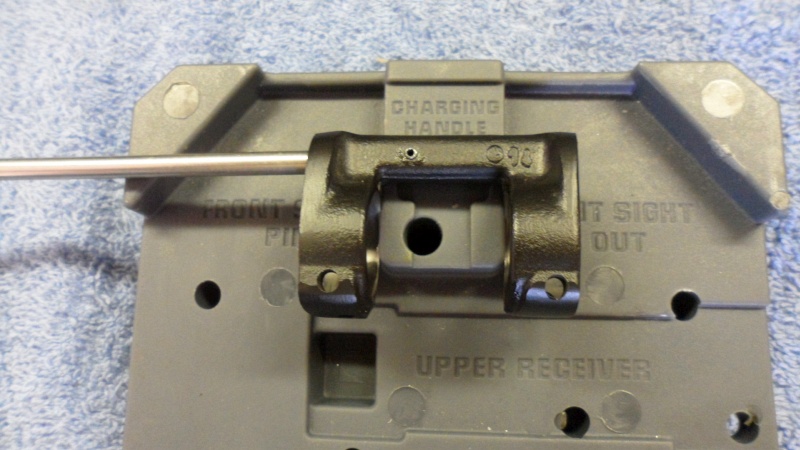
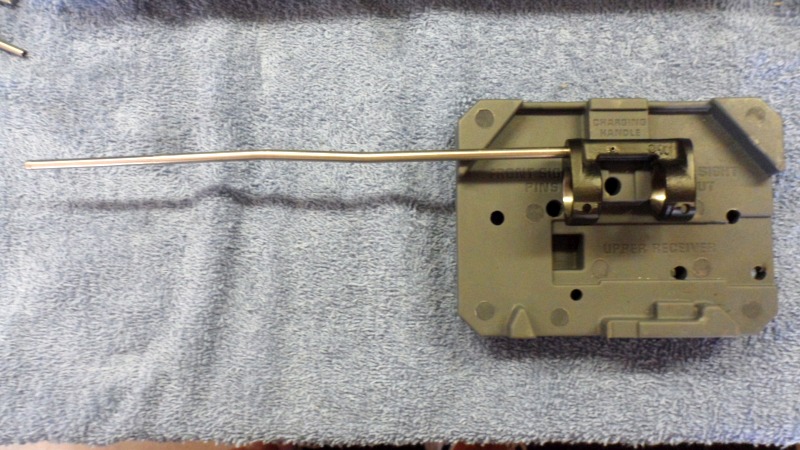
Next, you need to put the gas tube back in and install the itty bitty roll pin. Of course you need to make sure the holes line up correctly.
Now you install the new barrel nut that the quad rail mounts to. I added a dab of Never-Seize to the threads just to be on the safe side.
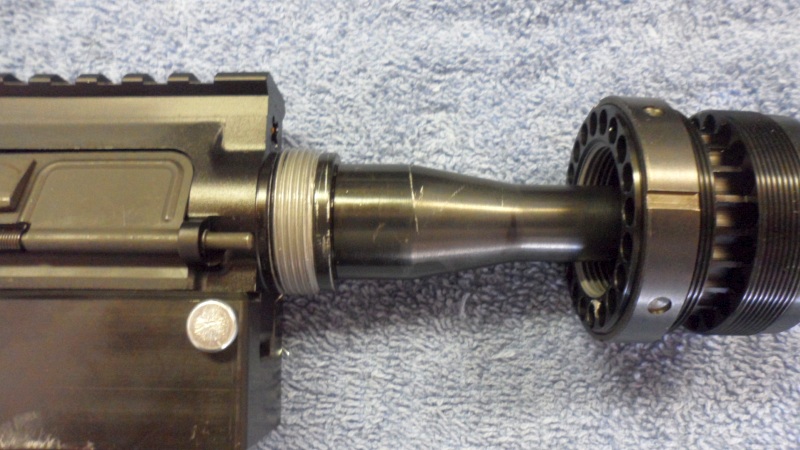
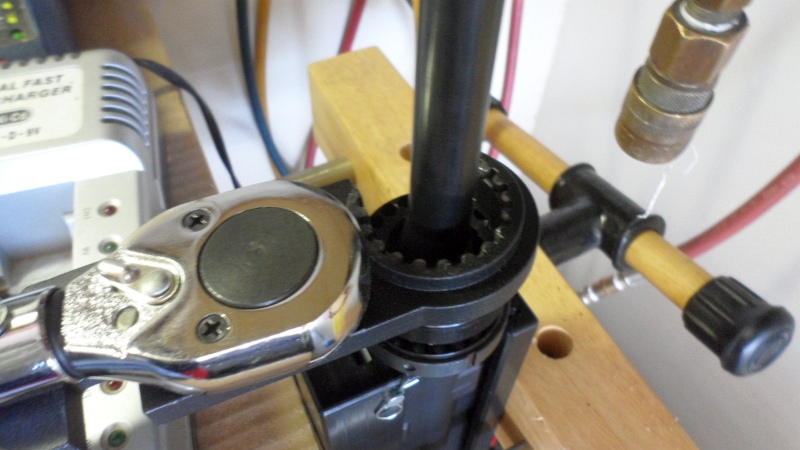
Next is torquing the barrel nut to spec using the AR15 wrench and a torque wrench. You also have to align up the gas tube hole. The spec is 35 to 80 psi from what I find. Mine worked to 35+. The key here is to line up the gas tube hole and not exceed max torque.
Next is re-installing the modified A2 gas tube. This can be a real chore as it is a very tight fit, has to go in straight and finally line up the retaining pin holes and the slots in the barrel.

NOTE - Before you drive the gas tube pins in, re-assemble the charging handle and bolt to make sure the gas tube is aligned and functioning.
Now re-install the flash hider making sure you get the crush nut and the flasher in the right orientation. Again you will need the upper vise block and AR15 wrench.
Now we are finally down to installing the quad rail. First, turn the jam ring back, add a dab of lube to the threads and screw the quad rail on the barrel nut.
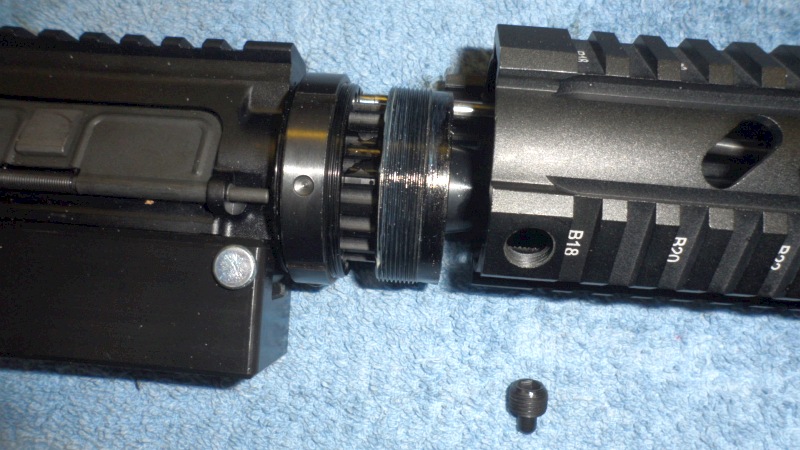
Once you have the quad rail on you need to line up the top rail to the rail on the upper. Now back off the quad rail about 1/8 of a turn, tighten the jam ring up against the quad rail and use a strap wrench to align the two rails.
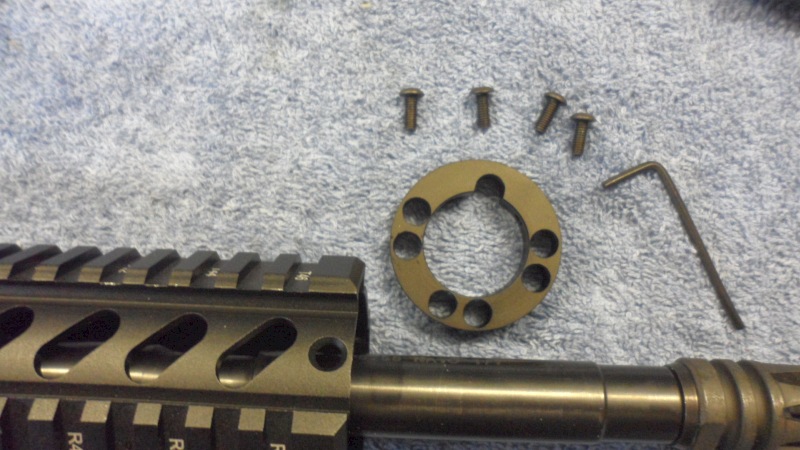
Next you need to install the front rail cap. It is held in with 4 small screws. I added a touch of blue Loctite to each screw just to be on the safe side.
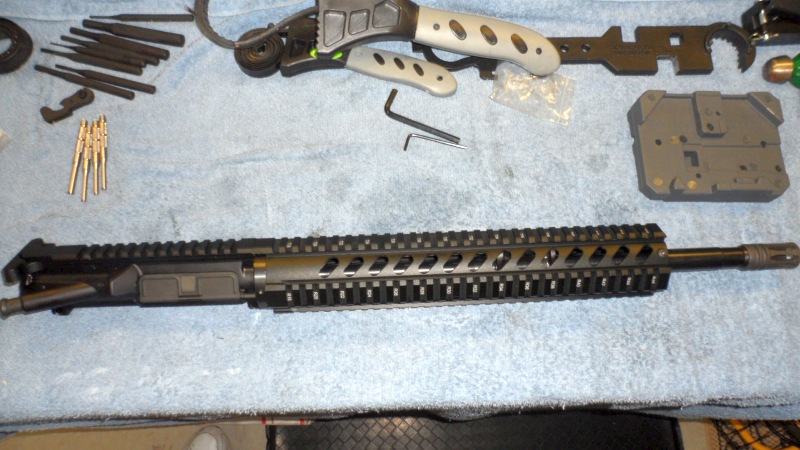
Your done... now just put the upper and lower together and take it for a test drive.